
Old, faded, or bubbling window tint can make your car look worn out and reduce visibility while driving. Whether you’re replacing damaged film or upgrading to a better tint, removing old window tint must be done carefully. If done the wrong way, it can damage your glass, rear defroster lines, or leave behind stubborn glue.
This guide explains how to remove window tint from car windows safely, using simple tools and step-by-step methods.
Why You Might Need to Remove Car Window Tint
Fading, Bubbling, Peeling or Purple Tint
Over time, low-quality tint can fade, turn purple, or start bubbling. Heat from the sun weakens the adhesive, causing the film to peel away from the glass. Once this happens, the only real solution is full removal.
Legal Tint Limits in Australia
Each Australian state has legal limits for visible light transmission (VLT). If your tint is too dark or not compliant, you may need to remove it to avoid fines or defects.
Poor Visibility or Glare Issues
Damaged tint can create haze, distort your view, or increase glare at night. This affects driving safety and should be fixed as soon as possible.
Preparing for New Window Tint Installation
If you’re upgrading to carbon or ceramic tint, the old film must be fully removed first. Proper removal ensures the new tint bonds correctly and looks smooth.
Selling or Restoring Your Vehicle
Many buyers prefer clean, factory-looking glass. Removing old or damaged tint improves the overall appearance and value of your vehicle.

Risks of Improper Window Tint Removal
Removing tint may look easy, but mistakes can be costly.
Damaging Rear Window Defroster Lines: Rear windows have thin heating lines attached to the glass. Aggressive scraping can break these lines, which are difficult and expensive to repair.
Scratching or Scarring the Glass: Using sharp tools incorrectly can leave permanent scratches on the inside of the window.
Leaving Stubborn Adhesive Residue: If the glue is not removed properly, it can harden and become difficult to clean later.
Electrical Risks with Modern Vehicles: Modern cars may have antennas, sensors, or electronic components in the glass. Excessive heat or liquid exposure can cause problems if not handled carefully.
Preparation Before Removing Window Tint
Good preparation makes the job easier and safer.
Choosing the Right Location: Work in a shaded, well-ventilated area. Direct sunlight can cause cleaning solutions to dry too quickly.
Cleaning the Glass First: Wipe down the inside of the window to remove dust and dirt. This prevents scratches during removal.
Protecting Door Panels & Interior Trim: Place towels or plastic sheets along the door panel to protect it from heat and liquid.
Safety Precautions to Follow: Wear gloves and eye protection. If using ammonia or adhesive removers, ensure proper airflow to avoid breathing fumes.
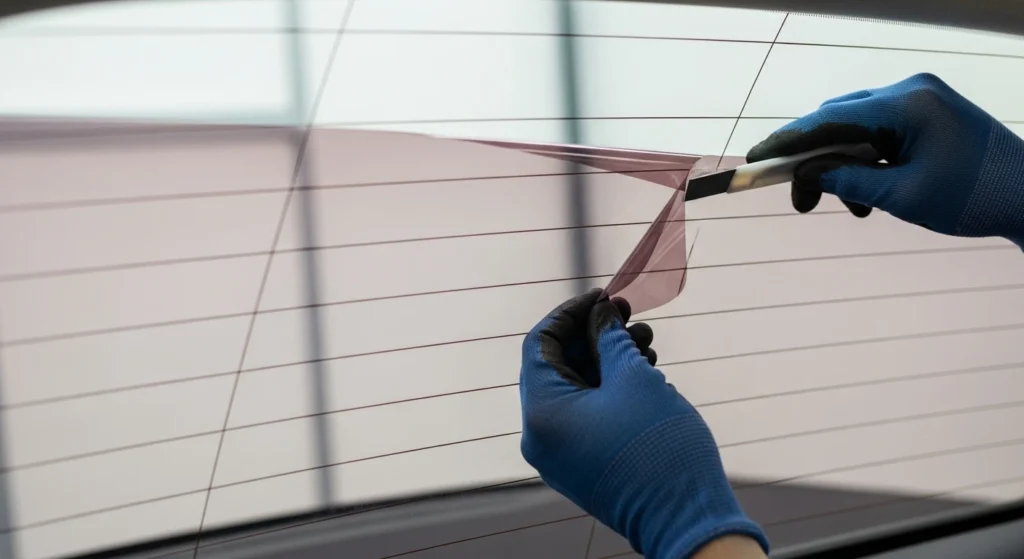
How to Remove Rear Window Tint Safely?
Rear windows require extra care because of defroster lines.
Protecting Defroster Lines: Avoid using razor blades directly over heating lines. Instead, rely on heat and gentle peeling.
Safe Peeling Techniques for Back Glass: Apply even heat and slowly peel the film at a low angle. If the tint tears, reheat the area before continuing. Patience is key to preventing damage.
Whether you need complete tint removal or want to upgrade to high-quality carbon or ceramic window tint, contact MH Auto Lab in Browns Plains for reliable and professional service.
Step-by-Step Guide: Heat & Peel Method (Most Effective DIY Method)
The heat and peel method is the most reliable and safest DIY option.
Step 1: Heating the Film Evenly
Use a heat gun or hair dryer. Move it slowly across the surface to warm the adhesive. Do not concentrate heat in one spot.
Step 2: Lifting the Corner Carefully
Use your fingernail or a plastic scraper to lift one corner of the film. Avoid sharp metal tools if possible.
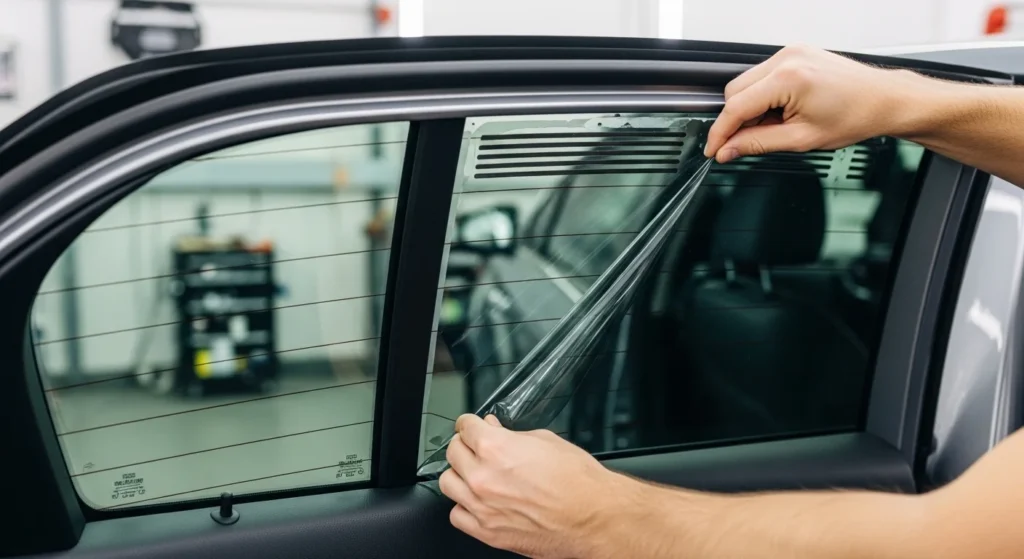
Step 3: Peeling the Tint Slowly
Pull the film slowly while applying heat ahead of the peeling area. Try to remove the tint in one large piece.
Step 4: Removing Remaining Glue Residue
Spray adhesive remover or soapy water onto the glass. Let it sit for a few minutes, then wipe gently with a microfiber cloth. For stubborn glue, use a plastic scraper carefully.
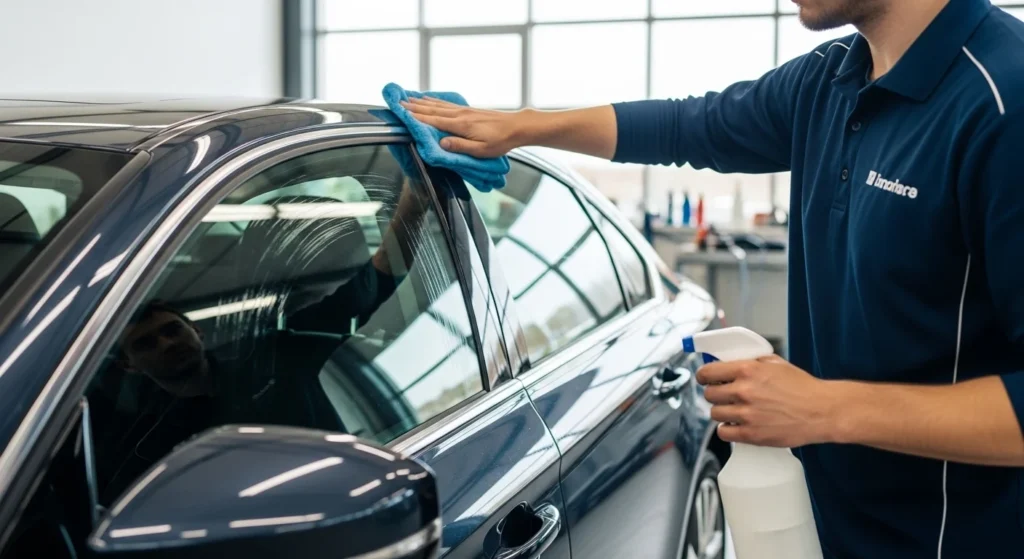
Step 5: Final Cleaning & Polishing
Clean the window with glass cleaner and wipe dry with a lint-free cloth. Make sure no residue remains before installing new tint.
Alternative Tint Removal Methods
If you don’t want to use a heat gun, there are other options.
Steam Method
A garment steamer can loosen the adhesive effectively. Hold the steamer close to the tint and allow moisture to penetrate the film before peeling.
Ammonia Method
Spray ammonia on the inside of the window, cover it with plastic wrap, and leave it in the sun for 30–60 minutes. The heat helps soften the adhesive. This method requires strong ventilation.
Razor Blade & Soapy Water Method
Spray soapy water and gently scrape the tint away. This method works but carries a higher risk of scratching if done carelessly.
Removing Tint Without Using Heat
In some cases, older tint may peel off without heat. However, glue residue is usually heavier and harder to remove.
How Long Does It Take to Remove Window Tint?
The time required depends on the condition of the film and your experience.
Time Required for Side Windows: For side windows, each side usually takes 20–40 minutes if the tint comes off smoothly.
Time Required for Rear Window: For rear window, it may take 45–90 minutes due to size and defroster lines.
Factors That Affect Removal Time
- Age and quality of tint
- Weather conditions
- Tools used
- Experience level
Old, brittle tint can take much longer to remove.
Common Mistakes to Avoid During Tint Removal
Using Excessive Heat: Too much heat can damage interior trim or even crack glass.
Scraping Too Aggressively: Heavy scraping increases the risk of scratches and damaged defroster lines.
Ignoring Safety Measures: Working without ventilation when using chemicals can be harmful.
Not Cleaning Properly Before Re-Tinting: Any leftover glue or dirt will cause bubbles in new tint film.
Professional Window Tint Removal & Installation at MH Auto Lab
If you want guaranteed results without the risk, professional removal is the safest option. At MH Auto Lab in Browns Plains, we provide expert window tinting services. Our team removes old, bubbled, or damaged tint safely, protects rear defroster lines, and ensures the glass is fully cleaned and prepared for new film.
Frequently Asked Questions
Q: Can I Remove Window Tint Without Damaging Defrosters?
Yes, but you must use heat and peel slowly. Avoid scraping directly over defroster lines.
Q: Will Tint Removal Scratch My Windows?
Glass itself is strong, but improper scraping with sharp tools can cause scratches.
Q: Can I Remove Tint Without Heat?
Yes, but it may leave more adhesive behind and take longer.
Q: Is Removing Window Tint Easy?
It can be simple if the tint is in good condition. Old or brittle tints are harder to remove.
Q: Does Removing Tint Void Warranty?
Removing aftermarket tint usually does not affect vehicle warranty. However, always check your vehicle’s terms.
Q: Can You Remove Factory Tint?
Factory privacy glass is tinted during manufacturing and cannot be peeled off. Only aftermarket film can be removed.